7 Best Label Tapes Designed for Freezer-to-Microwave Use
Discover the 7 best freezer-to-microwave label tapes. Learn which durable, heat-resistant adhesives ensure your food stays organized without peeling or fading.
We have all been there—pulling a container of chili from the freezer only to watch the paper label peel off or turn into a soggy mess in the microwave. Finding a label that survives the journey from sub-zero temperatures to high-heat radiation is a game-changer for meal prepping. This guide highlights the most reliable tapes to keep your kitchen organized without the frustration of labels failing mid-thaw.
Brother P-Touch TZe Tape: Best Overall Durability
Create durable, professional labels with this 2-pack of Brother P-Touch TZe-231 tape. Featuring 7-layer lamination, these ½” black-on-white tapes are resistant to water, fading, and extreme temperatures for lasting legibility on any surface.

If you are a fan of meal prepping for the week ahead, you know that condensation is the enemy of a good label. The Brother P-Touch TZe series is laminated, meaning the text is sandwiched between two layers of protective film. This construction makes it incredibly resistant to the moisture that forms during the freezing and thawing cycle.
Because these tapes are designed for industrial-strength use, they handle the rapid temperature shifts of a microwave better than almost any other option. While the initial investment for the label maker is higher, the cost-per-label remains reasonable for the longevity you receive.
For the average household, this is the gold standard for long-term storage. If you want a label that stays crisp and legible for months, this is your best bet.
Dymo LetraTag Plastic Labels: Reliable Adhesion

Sometimes you just need a quick, affordable solution for the leftovers in your apartment fridge. Dymo LetraTag plastic tapes are a fantastic middle-ground option that balances price with decent water resistance. Unlike paper-based labels, the plastic construction prevents the tape from absorbing moisture when you transition from the freezer to the microwave.
These labels are particularly great for families who go through a high volume of containers quickly. They are easy to peel and apply, even when your hands are cold from pulling items out of the freezer.
Just keep in mind that they aren’t as heat-proof as laminated tapes. For short-term reheating, they perform admirably, but they may eventually lose their grip if left in the microwave for extended periods.
Epson LabelWorks Iron-On: Great for Fabric Bags
Create professional labels for any office with the portable LW-PX300. Its print preview screen ensures accuracy, and it supports various label widths and specialty tapes for versatile organization.

Many of us are moving away from plastic containers toward reusable silicone or fabric-lined bags for freezer storage. If you use cloth-based freezer bags, standard adhesive tapes will simply fall off. The Epson Iron-On labels offer a unique solution by bonding to the fabric fibers with heat.
This is a brilliant hack for those who label their bulk-bought meats or pre-portioned veggie bags. Once the label is ironed on, it is essentially permanent, meaning it won’t peel off when you toss the bag into the microwave to defrost.
Be aware that this requires a bit more effort upfront than a standard sticker. It is a perfect choice for the organized home cook who values a tidy, uniform look in their chest freezer.
MFLABEL Direct Thermal Labels: Best for Bulk Use
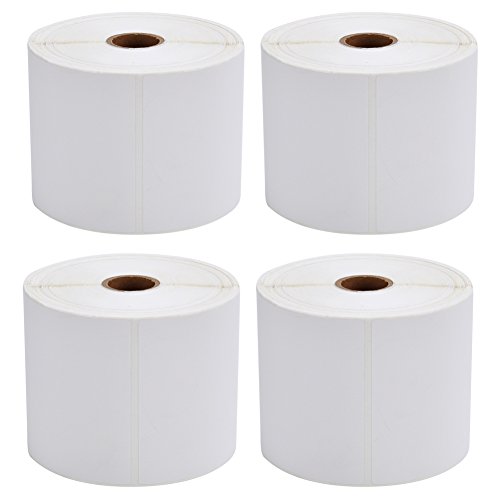
If you run a busy household or manage a small catering side-hustle, you likely have hundreds of containers to track. MFLABEL direct thermal labels are designed for high-volume printing, making them the most cost-effective choice for large-scale organization. You can print dozens of labels in seconds without worrying about expensive ink cartridges.
While these are not as "indestructible" as laminated tapes, they are surprisingly robust for everyday freezer use. They are perfect for labeling items you plan to consume within a few weeks.
The bottom line here is efficiency. If you are labeling dozens of containers at a time, the speed of these thermal labels will save you hours of work.
Avery Durable ID Labels: Ideal for Cold Storage
Avery is a household name for a reason, and their Durable ID labels are specifically engineered for harsh environments. These are excellent if you prefer to hand-write your labels rather than using a machine. They feature a heavy-duty adhesive that is designed to stay put even when frost builds up on the container surface.
These labels are thick and tear-resistant, which is helpful if you are constantly shuffling items around in a cramped freezer. They hold up well to the moisture of a defrosting meal, though you should avoid direct, prolonged contact with steam.
For those who want a simple, no-fuss solution, these are the best choice. They are inexpensive and can be kept in a kitchen drawer for immediate access.
Phomemo Self-Adhesive Tape: Best for Quick Jobs
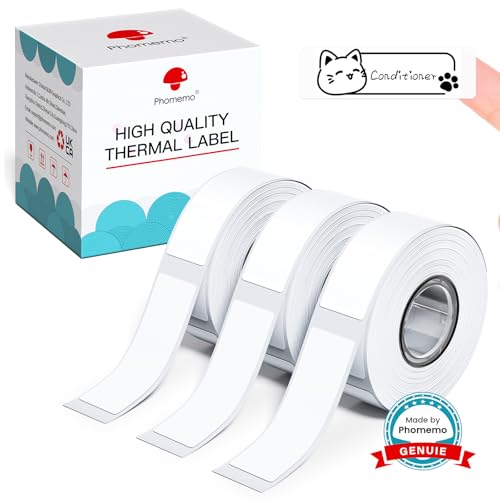
The Phomemo system is a favorite for those who like to label things on the fly using a smartphone app. Their self-adhesive tape is surprisingly sticky and handles the freezer-to-microwave transition with ease. It is a great option for renters who want a modern, sleek look without a bulky label maker taking up counter space.
The tapes come in various colors and designs, which is perfect for color-coding different types of food. If you have a small kitchen, the compact size of the printer and the tape rolls is a major plus.
Just be sure to press the label down firmly on a dry surface before freezing. This simple step ensures the adhesive sets properly before the temperature drops.
Niimbot Thermal Paper: Best for Small Containers

Niimbot labels are incredibly popular for a reason: they are compact, waterproof, and very affordable. Because they are thermal, they don’t require ink, which keeps your maintenance costs near zero. They are ideal for small, single-serving containers that you might grab for a quick office lunch or a late-night snack.
The labels are thin, so they don’t get in the way when you are stacking containers in a crowded freezer. They are surprisingly resistant to heat, making them a reliable companion for quick microwave reheating.
If you have a small apartment and limited storage, these are a fantastic space-saving solution. They offer the best balance of convenience and price for daily use.
Key Factors for Freezer-to-Microwave Labeling
When choosing a label, the most important factor is the adhesive type. You need a "permanent" or "all-weather" adhesive, as standard office labels will inevitably fail in the freezer. Look for labels that explicitly mention moisture resistance or lamination, as these layers provide a barrier against condensation.
Consider the surface you are labeling as well. Plastic, glass, and silicone all have different textures that affect how well an adhesive sticks. A label that works perfectly on smooth glass might struggle to stay on a textured plastic container.
Finally, think about your "rotation" speed. If you eat your frozen meals within a week, you don’t need industrial-grade labels. If you are freezing items for months, invest in the more durable, laminated options.
How to Ensure Labels Stick in Extreme Temps
The biggest mistake most people make is applying a label to a container that is already cold or damp. Always apply your labels to clean, dry, and room-temperature containers before filling them. This allows the adhesive to cure properly before it encounters the freezing process.
If you must label a frozen container, try to find a smooth, dry spot and use a hair dryer for a few seconds to warm the surface. This little bit of heat helps the adhesive bond much more effectively.
Avoid wrapping the label all the way around the container if it overlaps itself. The overlapping edge is the first place where moisture will seep in and cause the label to peel.
Best Practices for Removing Residue-Free Labels
We have all dealt with the dreaded "sticky residue" that remains after peeling off a label. To avoid this, look for labels marketed as "removable" or "residue-free," though these are often less durable in the freezer. If you use permanent labels, the best way to remove them is to warm the container under hot running water.
Once the adhesive is softened, the label should peel off in one piece. If a bit of glue remains, a small amount of vegetable oil or rubbing alcohol on a paper towel will dissolve it instantly.
Avoid using metal scrapers or knives, as these can scratch your containers and create tiny grooves where bacteria can hide. Stick to soft cloths or plastic scrapers to keep your kitchenware in top shape.
Choosing the right freezer-to-microwave label is about balancing your specific storage habits with the durability of the materials. Whether you opt for the high-end laminated protection of a Brother system or the quick, budget-friendly convenience of Niimbot, the key is proper application. Take a moment to prep your surfaces, and you will save yourself the headache of unidentified, messy leftovers for years to come.