8 Best Cable Clips For Rv Interiors For Tidy Walls
Keep your RV clutter-free with our top 8 cable clips. This guide explores durable, wall-safe solutions to organize cords and maximize your living space easily.
Nothing ruins the aesthetic of a cozy RV interior faster than a tangled mess of power cords snaking across your limited counter space. Managing cables in a small, mobile environment is about more than just looks; it is a vital step in maintaining a safe and functional living area. This guide will help you find the right organizational tools to keep your wires tucked away and your walls pristine.
Command Large Cord Clips for Damage-Free Hanging

If you are leasing your RV or simply wary of leaving permanent marks on your interior paneling, Command clips are the gold standard. They utilize a proprietary adhesive strip that holds firm against vibration while traveling, yet peels away cleanly without damaging delicate wall finishes.
These are best suited for heavier cords like those attached to your television or high-wattage kitchen appliances. Because they are larger, they offer a sturdy anchor point that won’t pop off when you hit a bump on the highway.
The trade-off here is the profile size; they are bulkier than other options and may not be the most "invisible" choice. However, for a renter or someone who likes to rearrange their setup frequently, the peace of mind regarding wall integrity is worth the extra bulk.
Blue Key World Silicone Cable Ties for Flexibility

Sometimes you don’t need to attach a cord to the wall; you just need to stop a long charging cable from turning into a bird’s nest. Blue Key World silicone ties are essentially rubberized "twist ties" that offer a soft, non-abrasive way to bundle excess length.
These are incredibly useful for families with children or pets because they have no sharp edges or rigid plastic parts that could cause injury. You can easily wrap them around a bundle of cords near your bedside table or under the RV dining booth.
Because they are made of silicone, they are virtually indestructible and won’t scratch the wood-look laminate often found in RVs. They aren’t a wall-mounting solution, but they are the most versatile "organizer" you can keep in your junk drawer.
JOTO Adhesive Cable Clips for Tight RV Corners

RV interiors are notorious for awkward nooks and crannies where wires seem to naturally gravitate. JOTO clips are designed with a low profile that allows them to tuck neatly into the tight corners of cabinetry or along the trim of your slide-outs.
These clips are ideal for thinner cables, such as phone chargers or LED light strips that need to follow the contour of a wall. Their adhesive backing is surprisingly tenacious, which is a must-have feature for the constant movement and temperature fluctuations inside a vehicle.
Keep in mind that once these are stuck, they are meant to stay put for a long time. Make sure you clean your wall surface with rubbing alcohol before application, or the adhesive will fail regardless of the brand quality.
OHill Self-Adhesive Cord Holders for Thin Wires

When you have a dozen small cables for various devices, you need a solution that keeps them separated rather than clumped together. OHill holders feature a multi-slot design that allows you to thread individual wires through distinct channels.
These are perfect for a "charging station" area on a desk or near a power strip where multiple devices congregate. By keeping the wires parallel, you prevent the frustrating "cable spaghetti" that happens when cords overlap and knot.
Because they are compact, they don’t draw much attention to themselves on the wall. Just be careful not to force thick, heavy-duty cords into these slots, as the plastic dividers are designed for lightweight cables only.
Monoprice Hook and Loop Ties for Bundling Cables

If you are a fan of utility over aesthetics, hook and loop (Velcro-style) ties are the most practical way to manage large cable bundles. These ties allow you to group multiple cords together, making it easy to add or remove a device without cutting anything.
They are particularly useful in the "basement" storage areas of an RV or behind a desk where cords are hidden from view anyway. You can buy them in long rolls and cut them to the exact length you need, which is a budget-friendly way to organize an entire vehicle.
These aren’t meant for sticking to walls, but they are essential for the "back-end" of your electronics. Use them to bundle the slack behind your TV so it doesn’t hang down and become an eyesore.
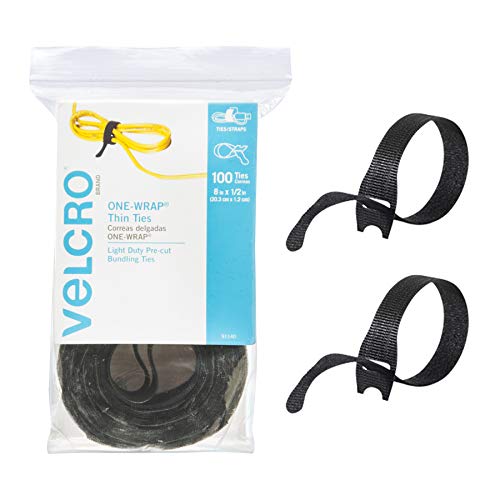
VELCRO Brand One-Wrap Ties for Adjustable Storage
Organize cables effortlessly with VELCRO Brand ONE-WRAP ties. This 100-pack of 8-inch black straps features a pre-cut, self-fastening design for secure and reusable wire management in any setting.
Similar to standard hook and loop, the VELCRO Brand One-Wrap is a premium version that grips itself firmly and stays secure during travel. These are ideal for securing bundles that need to be moved or adjusted frequently, such as the power cord for your shore-power connection.
The advantage here is the durability of the material; it won’t fray or lose its grip even after dozens of uses. For RVers who move locations often, having a reliable way to bundle heavy-duty power cables is a massive time-saver.
While they are slightly more expensive than generic brands, the consistency of the grip is superior. They are a "buy it once" item that will likely last as long as the RV itself.
E-Z Travel Collection Clips for Wall Organization
These clips are specifically marketed for the travel industry, often featuring designs that account for the unique wall materials found in campers. They are a great middle-ground option for those who want a balance between aesthetic appeal and holding power.
They usually come in neutral colors that blend well with common RV interior palettes, such as beige, grey, or white. This makes them less obtrusive than industrial-looking cable management solutions.
Before installing, check the weight capacity listed on the package. While they are great for standard cords, they are not intended for heavy-duty extension cables or massive power bricks.
D-Line Cable Tidy Units for Concealing Power Strips
Sometimes, no matter how well you clip your wires, the power strip itself remains an eyesore. D-Line units are essentially small, sleek boxes that you place your power strip and excess cord length inside to hide the clutter completely.
This is the best solution for the "main" power hub in your RV, usually located near the television or the main living area desk. It transforms a chaotic mess of plugs into a clean, minimalist box that sits neatly on a shelf or the floor.
While they take up more physical space than simple clips, they provide a much cleaner look. If you have the shelf space, this is the ultimate way to make your RV feel more like a permanent home.
Factors to Consider When Choosing RV Cable Clips
- Surface Compatibility: RV walls are often thin, textured, or covered in vinyl wallpaper. Always test a small, hidden area to ensure the adhesive won’t peel the finish.
- Vibration Resistance: RVs move and shake constantly; choose clips with high-quality adhesive that won’t dry out or lose grip due to road vibrations.
- Cable Thickness: Match the clip size to your cable diameter. Using a clip that is too small puts stress on the wire, while one that is too large allows the cord to sag.
- Frequency of Adjustment: If you frequently unplug devices, choose a clip that allows for easy insertion and removal rather than a "lock-in" style.
Best Practices for Installing Clips on RV Walls
- Clean the Surface: Wipe the wall thoroughly with isopropyl alcohol to remove dust, grease, or cleaning product residue. This is the single most important step for long-term adhesion.
- Pressure is Key: Apply firm, consistent pressure to the adhesive backing for at least 30 seconds after placement. Don’t add the weight of the cable until the adhesive has had at least an hour to "cure."
- Avoid High-Heat Areas: Avoid placing adhesive clips directly next to heat sources like heaters or windows that get intense direct sun, as heat can soften the adhesive and cause it to fail.
- Plan Your Path: Before sticking anything down, map out the route of your cables. Use painter’s tape to hold the cords in place temporarily to see how the layout looks before committing with permanent adhesive.
Organizing your RV cables is a small investment that pays off in daily convenience and peace of mind while on the road. By selecting the right combination of adhesive clips and bundling ties, you can transform your interior into a tidy, stress-free space. Remember that the best solution is the one that fits your specific travel routine, so don’t be afraid to mix and match these methods to suit your needs.