7 Best TV Cable Concealment Kits for Clean Walls
Tired of messy wires? We review the 7 best cable concealment kits to hide cords and achieve a sleek, organized wall setup for your home entertainment system.
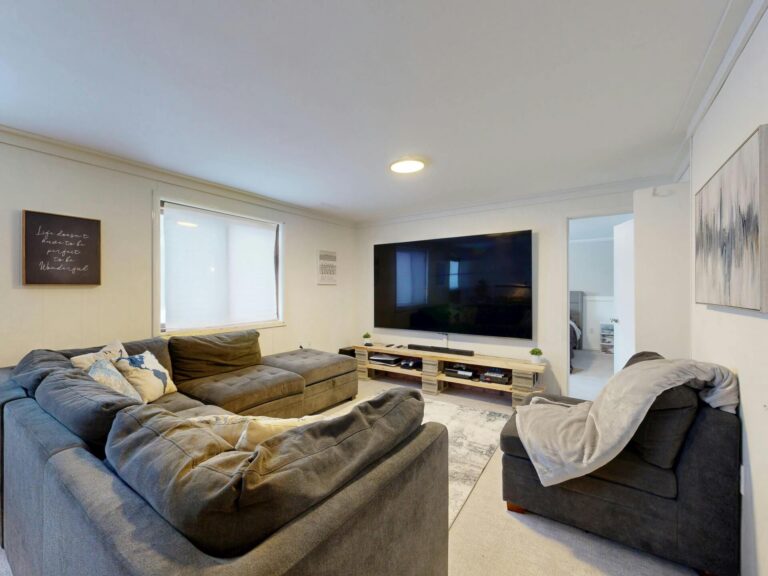
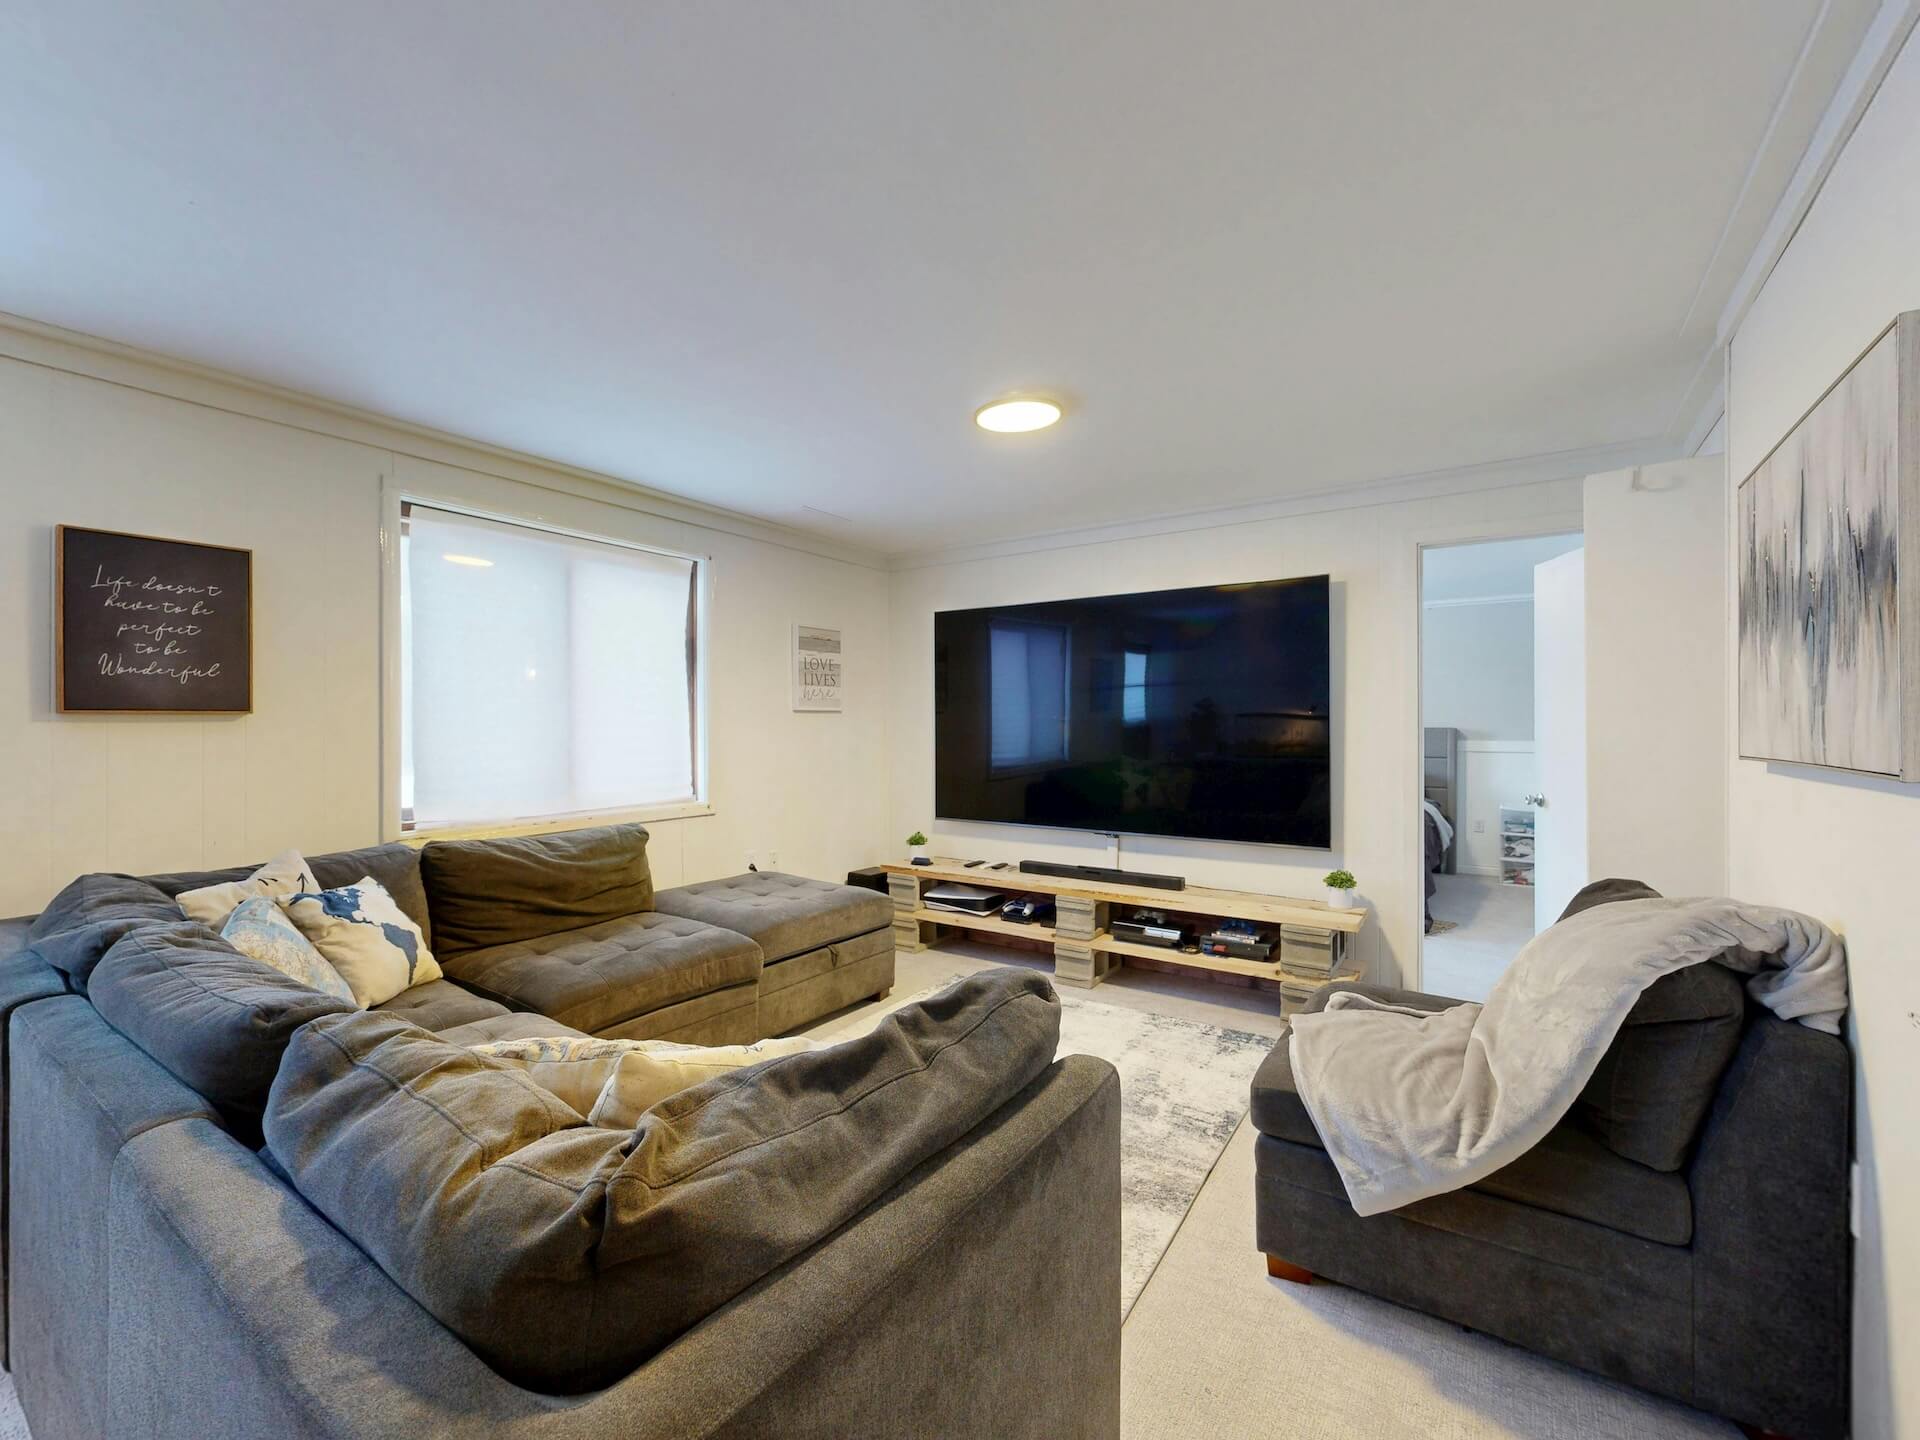
There is nothing quite as frustrating as finishing a sleek TV wall mount installation only to have a tangle of black cables dangling like an eyesore down your wall. Achieving a clean, professional look doesn’t require a professional electrician, but it does require the right hardware to manage those unsightly cords. This guide will walk you through the most reliable kits to help you reclaim your living room from cable clutter.
Legrand In-Wall Cable Management Kit for TVs
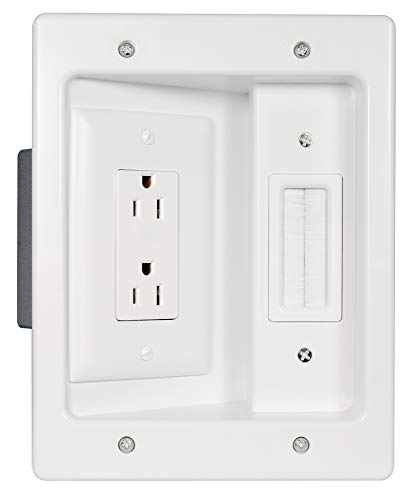
If you own your home and are looking for a permanent, "no-wires-visible" look, this kit is the gold standard for DIY enthusiasts. It features a simple two-piece design that allows you to route power and HDMI cables behind the drywall, effectively hiding them from view.
The beauty of this system is that it doesn’t require you to touch your home’s electrical wiring directly. You are essentially creating an extension cord that lives inside your wall, which is much safer and more manageable for the average homeowner.
However, keep in mind that this kit requires cutting into your drywall. If you are a renter or aren’t comfortable with a drywall saw, you might find this process a bit intimidating, even if the instructions are straightforward.
CordMate II Raceway Kit for Surface Mounting
Organize and hide multiple cords with the Legrand Wiremold Cable Management Kit. Its easy, peel-and-press installation and paintable white finish seamlessly blend with your decor, protecting and concealing cables for a clean look.
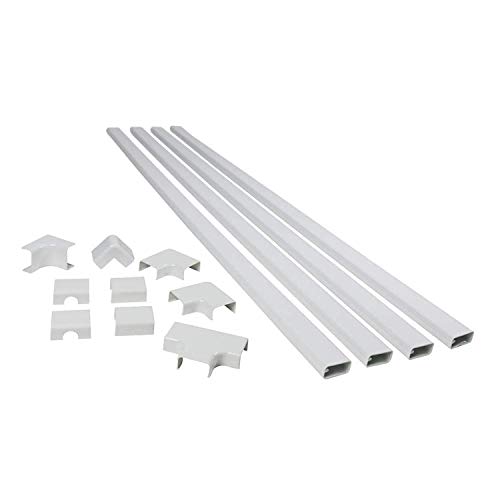
For apartment dwellers or those who don’t want to cut into their walls, surface-mounted raceways are a lifesaver. The CordMate II is a classic, reliable option that sticks directly to the wall, housing your cables inside a slim, protective channel.
This kit is incredibly budget-friendly and requires nothing more than a peel-and-stick application. It’s perfect for temporary setups where you might want to move your TV later without leaving behind a large hole in the plaster or drywall.
The main tradeoff here is aesthetics; while the channel is paintable, it will still protrude slightly from the wall. If you have baseboards or door frames, you can often run the raceway along them to make the installation blend in more naturally.
OmniMount OECMK Cable Management System

The OmniMount system is designed for people who want a balance between a high-end look and ease of installation. It’s a very popular choice for those who have a TV mount already installed and just need a clean way to bridge the gap between the screen and the outlet.
This kit is particularly durable, offering a robust construction that holds multiple thick cables without bowing or sagging. It’s a great fit for busy households with kids or pets, as it keeps cords securely locked away and protected from accidental tugging.
While it is slightly more expensive than basic plastic raceways, the build quality is significantly higher. You are paying for a product that won’t yellow over time or lose its adhesive grip after a few months of heat exposure.
Wiremold CMK10 Cord Cover Kit for Walls

If you have a massive amount of cords—perhaps from a gaming console, a soundbar, and a streaming box—the Wiremold CMK10 is your best friend. It offers a wider channel than most competitors, meaning you don’t have to fight to squeeze cables into place.
This kit is highly versatile, coming with various connectors like elbows and T-fittings that allow you to route cables around corners or across long stretches of wall. It’s the "Lego set" of cable management, allowing you to customize your path to the outlet.
The downside is that the plastic components can look a bit industrial if left unpainted. I always recommend grabbing a small sample of your wall paint to coat the raceway, which makes it virtually disappear into the background.
Echogear In-Wall Cable Routing Kit Choice

Echogear has built a reputation for making products that are genuinely easy to install, and their in-wall kit is no exception. It is designed for the person who wants a clean look but is worried about the complexity of the installation process.
The kit includes a specialized hole saw attachment for your drill, which ensures you get a perfect cut every single time. This removes the "measure twice, cut once" anxiety that usually keeps people from attempting in-wall projects.
It is a fantastic mid-range option that bridges the gap between professional, high-end installations and basic DIY. Just ensure your wall isn’t a fire-rated wall or a brick wall, as this kit is strictly meant for standard residential drywall construction.
Sewell Direct Ghost Wire for Flat Surfaces

Sometimes, the issue isn’t just the wall—it’s the gap between the wall and your furniture. Sewell Direct’s Ghost Wire is an incredibly thin, adhesive-backed cable that can actually be painted over or wallpapered, making it invisible on flat surfaces.
This is perfect for running cables across a floor or along a wall where you cannot use a bulky plastic channel. It is a niche solution, but for specific layouts, it is the only way to achieve a truly seamless appearance.
Be aware that these cables have specific limitations regarding signal length and power capacity. They are excellent for HDMI or low-voltage runs, but they aren’t meant to replace your standard power cords for high-draw electronics.
D-Line Cable Raceway for Paintable Concealment
D-Line is known for its sleek, semi-circular profile, which looks much more intentional than the flat, square-edged raceways found in most hardware stores. It’s a great choice if your TV is in a high-traffic area where the cable cover will be visible to guests.
The snap-on lid design makes it incredibly easy to add or remove cables later as your tech setup changes. If you upgrade your soundbar or add a new console, you won’t have to rip the whole system off the wall to swap a cord.
The adhesive backing is strong, but if you have textured walls, you may need to use small screws to ensure a permanent hold. It’s a small extra step, but it guarantees that your hard work won’t peel off during a humid summer.
How to Choose Between In-Wall and On-Wall Kits
Choosing the right kit comes down to your living situation and your comfort level with home improvement. If you own your home, in-wall kits offer the cleanest look and increase the long-term value of your media space.
If you are a renter, stick to on-wall raceways. They provide an excellent aesthetic result without violating your lease or leaving permanent damage behind when you move out.
- Consider your wall type: Drywall is easy to work with; brick, concrete, or fire-rated walls are not suitable for standard in-wall kits.
- Consider your cable count: If you have more than three cables, prioritize wider raceways or kits that specifically mention high-capacity management.
- Consider your budget: On-wall kits are significantly cheaper, but in-wall kits are a "buy it once" investment that lasts as long as the house.
Safety Tips for Routing Cables Behind Drywall
Safety should always be your top priority when modifying your walls. Never run standard power cords inside a wall; they are not rated for it and can pose a fire hazard if they overheat or become damaged by internal wall components.
Always use a kit that is specifically UL-rated or designed for in-wall use. These kits include specialized, fire-rated cables that are safe to hide behind your drywall, ensuring your home remains protected.
- Avoid electrical lines: Use a stud finder with voltage detection to ensure you aren’t drilling into existing electrical wires or plumbing.
- Check for fire blocks: Be aware of horizontal wooden fire blocks inside your wall that might prevent you from dropping cables from top to bottom.
- Follow instructions: Never bypass the safety features of the kit, such as the protective grommets that prevent the cable insulation from rubbing against the sharp edges of the drywall.
Essential Tools for Installing Cable Raceways
You don’t need a full workshop to get these kits installed, but having the right tools will save you an hour of frustration. A good quality stud finder is non-negotiable; you need to know exactly where the wood is so you can avoid it.
For in-wall kits, a drywall saw or a hole saw bit for your drill is essential. If you are installing an on-wall raceway, a simple level and a sharp utility knife are all you really need to get straight, clean lines.
- Level: A small torpedo level ensures your raceways aren’t crooked.
- Utility Knife: Essential for trimming the raceway covers to the exact length of your wall.
- Painter’s Tape: Use this to mark your lines on the wall before you peel the adhesive backing; it prevents mistakes and keeps your work area clean.
Tackling your cable clutter is one of the most rewarding home projects you can undertake for a relatively low cost. Whether you choose a permanent in-wall solution or a simple paintable raceway, the result will be a cleaner, more relaxing space to enjoy your favorite shows. Take your time with the installation, and don’t be afraid to paint your covers to match your walls for that perfect, invisible finish.